Building from last week’s checklist application, today in the workshop it was all about adding new items to the list and inserting in an input menu where users would type out their new objects. Building from the application we built last week, below is the process that was used.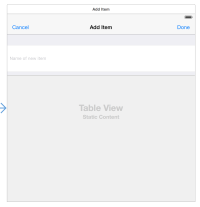
The first stage was to create a new ‘View.Controller’ to hold the input menu where users would add the new item to the list. A ‘Bar Button Item’ in the ‘Main.Storyboard’, was added, which behaves similarly to a button, and has a title, action and target, however this class also provides methods you can use to specify it with a system provided image that is recognisable from the iOS 8 UI kit.
The next stage was to create the text field so the user can input text and use the ‘Done’ button to update the table with the new item and use the ‘Cancel’ button to not save any changes that have been made and dismiss the ‘View.Controller’ menu. This was done using delegates to transfer the data from one ‘View.Controller’ to another. For ‘Done’ a new ‘ChecklistItem’ is created with its name property set to the value of the text field. The delegate is then called and passes it to the new item. For ‘Cancel’, it simply calls the delegate cancel function which dismisses the ‘View.Controller’ menu.

![]()
For the last stage a ‘protocol’ was created. This is the declaration of the method the delegate promises to implement, one if the user cancels and one if the user confirms.

After completing this workshop I feel much more comfortable with the idea of delegates and how they are use to move data from one controller to another.
Below is the finished application as a demonstration:
